Autonomous POI setup
- Lalanne Laurent
- Harold Hankins
- Doc Hardinger
Introduction
This page talks about Point of Interest (here called POI). You could use it for example in aerial photography. Your vehicle nose will always point to the POI when using autonomous flight modes like Position Hold, PathPlanner or GPS Assist (not tested yet).
This is the manual use of POI, in future releases there will be easier ways to set the POI (LibrePilot2Go Android App and GCS).
Prerequisites
- MAG and GPS must work properly (see here for help with MAG problems Aux Mag Setup and Calibration or search the Forum https://forum.librepilot.org)
- Altitude Hold must work properly (see Altitude Hold)
- Flight in Velocity Roam or Position Hold must be stable (see here for help Advanced features)
- Do some successful flights in PathPlanner flightmode.
- You may need an OPLink or simply use USB for telemetry connection.
POI setup
About altitude
The WGS84 altitude in HomeLocation does not refer to the common altitude (usually MSL : Mean Sea Level) of a location but takes in account others parameters like the Geoid separation:
Altitude (WGS84) = Height (MSL) + Geoid Separation
Look at the altitude displayed in the Attitude tab > Settings
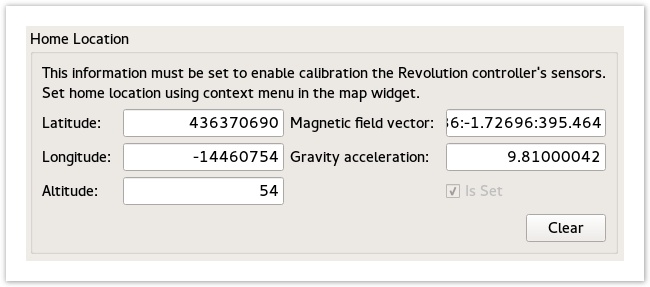
After a clear, this value should be updated automatically using a reliable GPS position and Geoid separation coming from GPS.
Next you should use this altitude value as reference for your HomeLocation/POI settings.
HomeLocation as POI Location
- Power your copter and connect to telemetry with GCS over OPLink or USB
- Wait until you get a good GPS signal and reliable position.
- Set your HomeLocation where your POI should be. Be sure to set height correctly (Its important because its needed for PathPlanner flightmode)
Now the POI is always there where your HomeLocation is set. That's not a good idea if you want to use pathplanner flightmode or use the HomeLocation for RTB . This is because when changing HomeLocation, Waypoints will also change relative to your HomeLocation.
Anyway it will also work in PathPlanner flightmode.
POI Location with fixed HomeLocation
- Power your copter and connect to telemetry with GCS over OPLink (USB will also work but then your copter is limited in movement, see step 4)
- Wait till you get a good GPS signal and reliable position.
- Set your HomePosition near where you are flying. Be sure to set height correctly (Its important because in PathPlanner flightmode copter will first fly to HomeLocation and then to the waypoints and heights for waypoints will be used from HomeLocation)
- Take your copter and move it to the location where POI should be and leave it there.
- Go to System > Data Objects and open up PoiLocation and PositionState.
- Click on the North value (standard 0,0000) at PoiLocation and set it to the value of North from PositionState (Don't hit enter or click elsewhere with mouse after input value, otherwise it will be overwritten by telemetry data from flight controller).
- Click on the red Up arrow on the top

- Repeat step 6 and 7 for East and Down values
Now your POI is set to the actual position of your copter. If you want to move the POI you can just repeat steps 4 - 8. And the good thing is that you always have a safe HomeLocation for example in case of RTB.
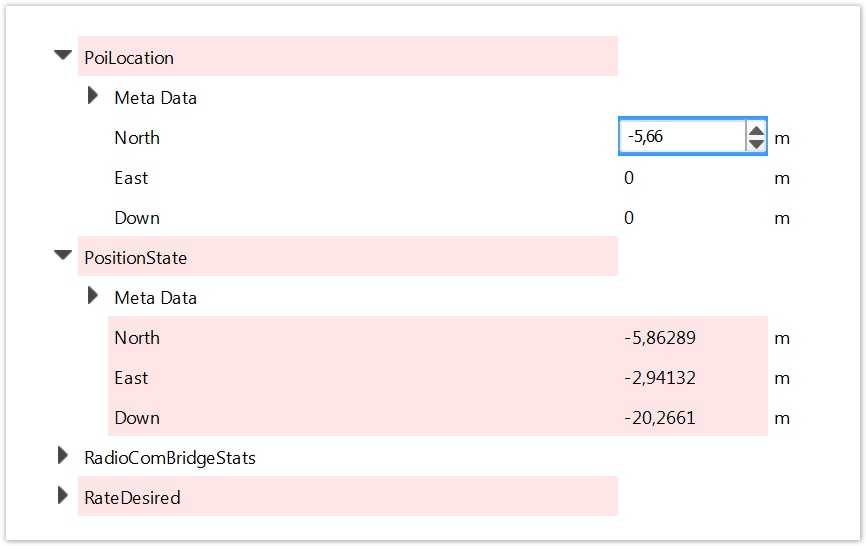
Image 1
Activate / Deactivate YAW Control
Now that you have set up the POI Location you must activate it for autonomous flight modes. Which means that your copters front will always point to the POI you defined earlier after activating the YAW control.
- To activate YAW Control go to System > VtolPathFollowerSettings > YawControl and choose POI (see image 2)
- To deactivate YAW Control go to System > VtolPathFollowerSettings > YawControl and choose Manual
Test it!
- Set up a first flightmode in normal Attitude mode for take off (or another mode just for take off)
- Set up a second flight mode with Position Hold
- Take off in first flightmode
- Switch to second flight mode (Position Hold) but be ready to switch back to the first flightmode if something goes wrong.
The copter should now Yaw automatically and point to your defined POI. Be prepared, the initial Yawing could be really fast, it depends on your Rate YAW.
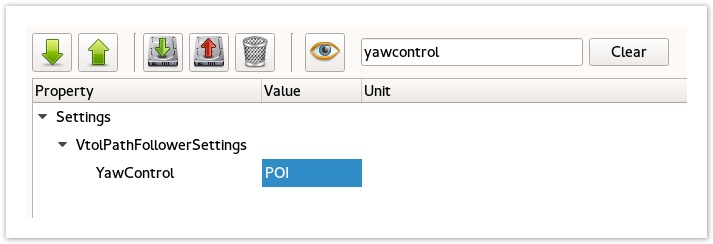
Image 2
Use POI in PathPlanner FlightMode
Be aware that when using HomeLocation as your POI when you change the HomeLocation all waypoints will move relative to your HomeLocation.
It's possible to change your waypoint parameters to absolute coordinates (In WayPoint Editor set Relative to Home to false) but this has not been tested yet.
Example 1 (3 waypoints)
- Set up a flightmode in normal Attitude mode for take off (or another mode just for take off)
- Set up a second flight mode with Velocity Roam (just to be sure GPS mode is working fine)
- Set up a third flightmode with PathPlanner
- Do POI Setup (see above) and Activate YAW Control (see above).
- Go to Flight Data Tab and put in 3 waypoints (it's best if the waypoints are around your POI):
- Right click on the map and choose AddWaypoint.
- Do the same for the other 2 waypoints.
- Move the waypoints with leftmouse hold to the position where you want them to be.
- Right click on map and choose WaypointEditor.
- Double check Positions (they're relative to your Homeposition) and AltitudeAboveHome. (it's the height above your Homeposition, so again be sure your Homeposition height is set correctly)
- In WaypointEditor click on the green up Arrow to send the pathplan data to your copter.
- Take off in the first flightmode, it can be as simple as Attitude mode.
- Switch to Velocity roam and check if everything works well.
- Switch to PathPlanner flightmode and be ready to switch back to the first or second flightmode if something goes wrong.
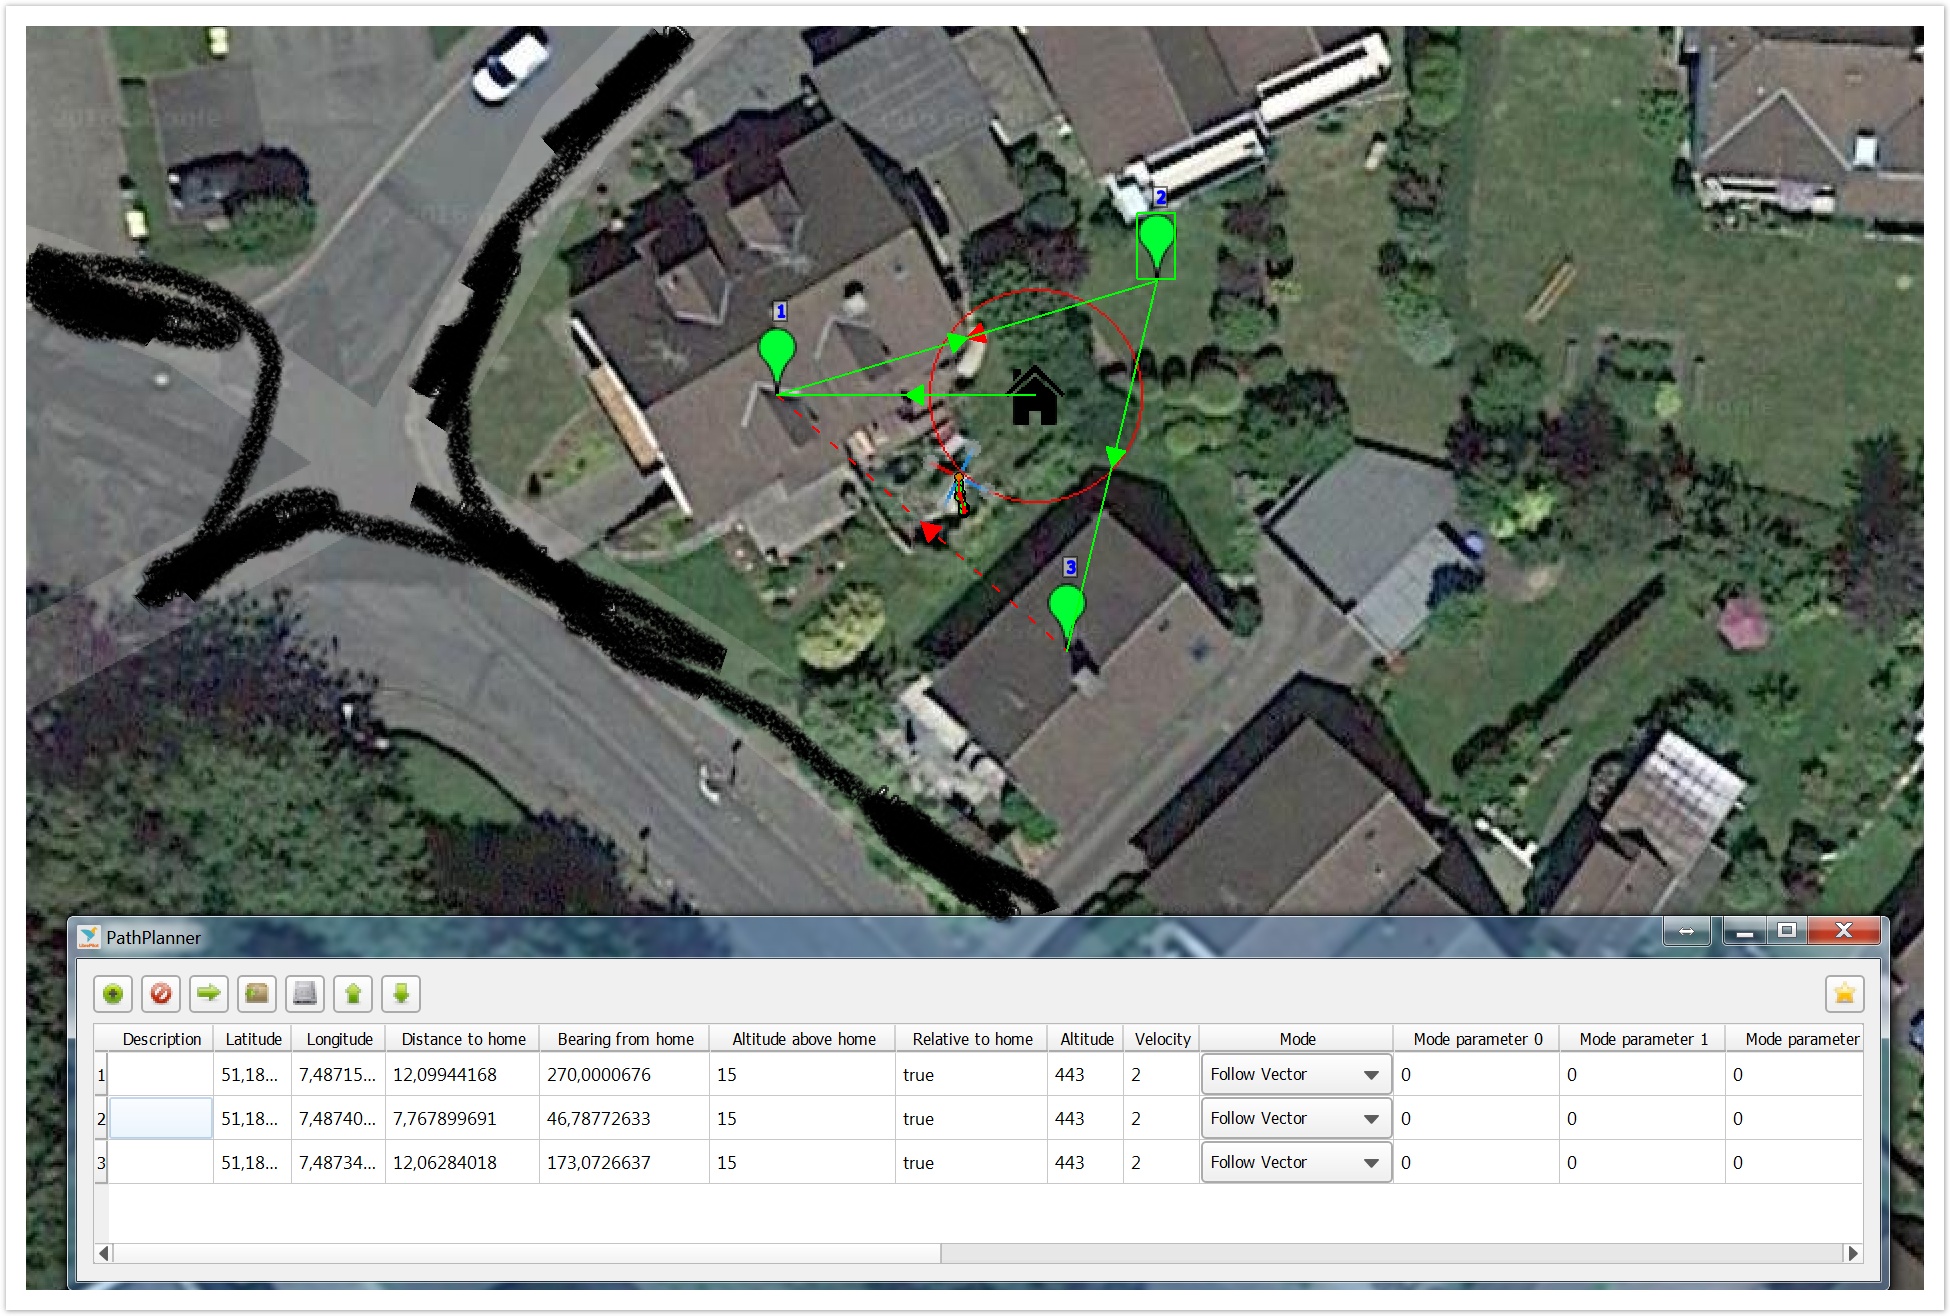
Now your copter should fly first to HomeLocation and then to the waypoints with it's nose always pointing to your POI. It will repeat the flightplan until you switch to another flightmode.
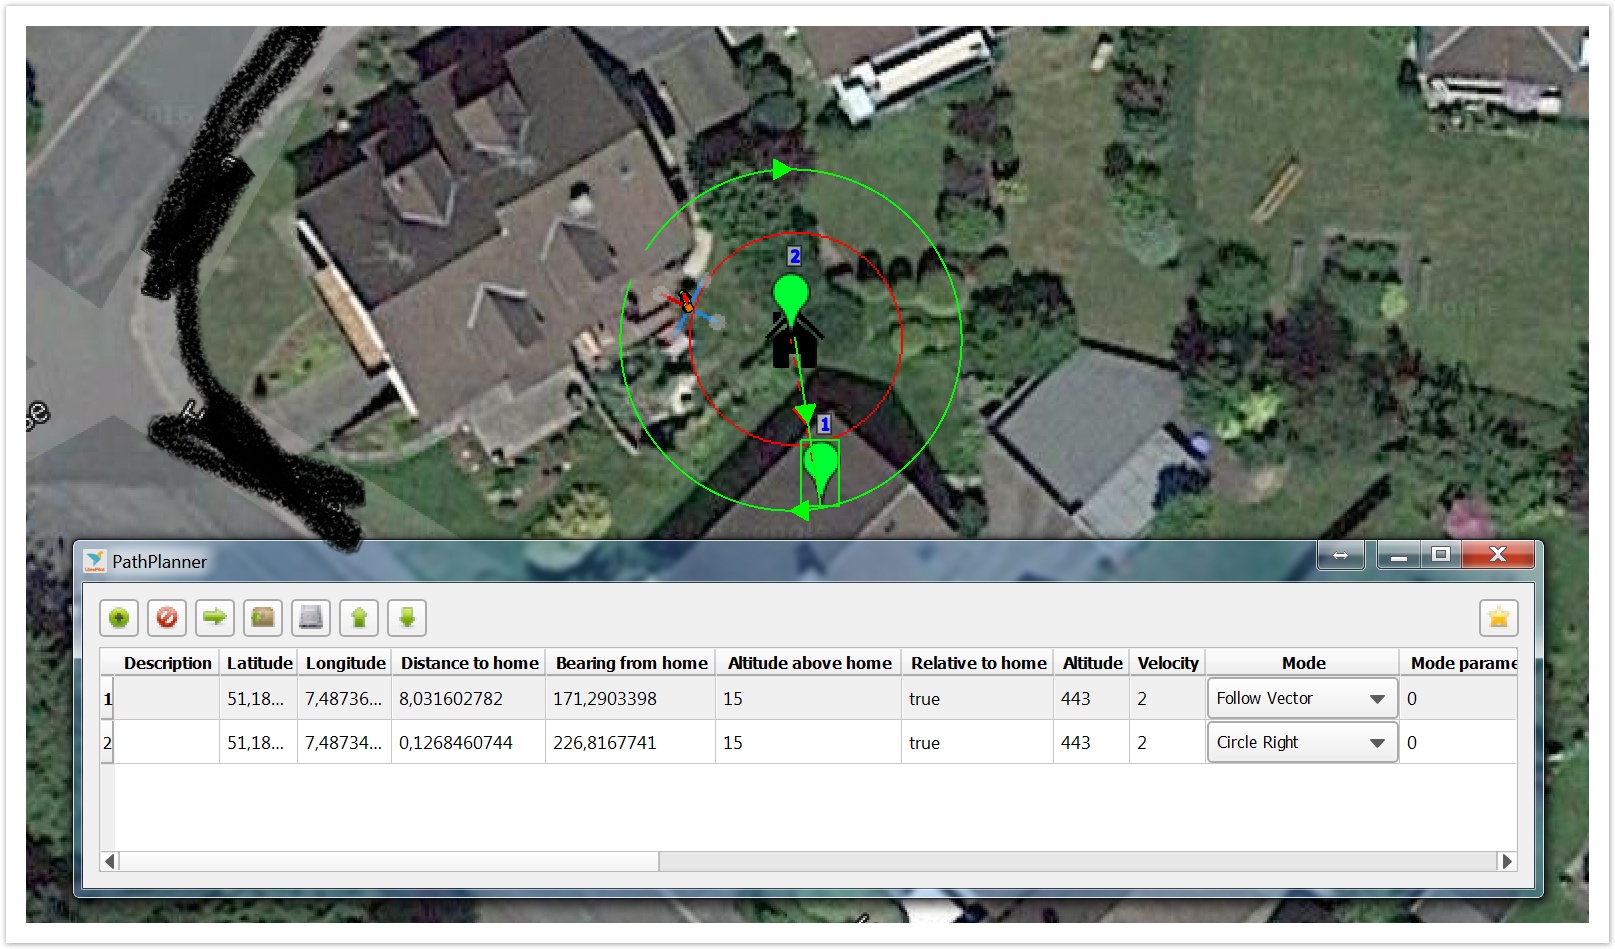
See the picture below, in this example POI is set to HomeLocation and there are three waypoints around it.
Example 2 (Circle around POI)
- See steps 1 - 4 in Example 1
- Go to the Flight Data Tab and put in 2 waypoints:
- Right click on the map and choose AddWaypoint.
- Do the same for the second waypoint
- Move the second waypoint to your POI location.
- Move the first waypoint to somewhere outside your POI. (this will be the radius of the circle)
- Right click on map and choose WaypointEditor.
- Double check Positions (they're relative to your Homeposition) and AltitudeAboveHome. (its the height above your Homeposition, so again be sure your Homeposition height is set correctly)
- Change the mode of the second waypoint to circle right or circle left
- In WaypointEditor click on the green up Arrow to send the pathplan to your copter
- Take off in the first flightmode, it can be as simple as Attitude mode.
- Switch to Velocity roam and check if everything works well.
- Switch to PathPlanner flightmode but be ready to switch back to first or second flightmode if something goes wrong.
Now your copter should fly first to the HomeLocation, then to the first waypoint and the begin to circle around your POI with nose always pointing to your POI. It will repeat the flightplan until you switch to another flightmode.
See the picture below, in this example POI is set to HomeLocation: