LibrePilot2Go Android App
- Marc Proe
*Android, Google Play, and the Google Play logo are trademarks of Google Inc.
|
|---|
Read me first (please)
LibrePilot2Go is currently available as public beta and closed alpha version.
![]() Please be aware that the App is in testing stadium, and may not function properly, crash or not work at all on your device.
Please be aware that the App is in testing stadium, and may not function properly, crash or not work at all on your device.
![]() Please do not install the App if you are expecting a ready to use, bug free, always working app.
Please do not install the App if you are expecting a ready to use, bug free, always working app.
![]() Please read the rest of this wiki article before using LibrePilot2Go. All of it.
Please read the rest of this wiki article before using LibrePilot2Go. All of it.
![]() Please also give feedback about the app in the official forum.
Please also give feedback about the app in the official forum.
To stay up to date about changes and new versions, subscribe the LibrePilot2Go Google+ Community.
There is also a board on the official forum about the app.
The public beta is available on Google PlayTM:
![]()

If you need to install LibrePilot2Go on a FireOS device, and you really want to use the amazon appstore, use this link:
(No Amazon Maps support; Maps will most likely not work and/or crash.)

If you don't want to use any appstore, and you know what you are doing, you can download the APK here. Please be aware that you will not receive any updates automatically.
Introduction
LibrePilot2Go is a lightweight app for AndroidTM to use LibrePilot in the field.
Its purpose is not to be a GCS for Android, but it focuses on functionality needed while preparing the flight and during flight.
The app supports Android 4.0+ (Ice Cream Sandwich, Jelly Bean, Kitkat, Lollipop, Marshmallow) (Api Level 14+). It aims at phones with large screens. It will work on tablets, but is not necessarily optimized for larger screens than 6".
Connection
USB
USB is used to attach the phone via cable to the flight controller, or to use an OPLink mini to receive data via OPLink. Use 38400 baud as oplink speed.
Set the connection in the settings dialogue.
Your Phone needs to support USB OTG, not all phones support this. To check general USB OTG support, check http://www.gsmarena.com. Under COMMS / USB, the entry USB-Host has to be present.
You need a special cable. Search amazon for "otg", for example.
Bluetooth
With this connection, the android device connects directly to a Bluetooth serial telemetry link on the flight controller or to an OPLink module.
Read this article to set up Bluetooth telemetry for your board: Setup a bluetooth for telemetry. Set the connection in the settings dialog.
You have to pair your device with the normal settings of your android phone before you use Bluetooth. After that, you can choose the device in the settings dialogue. You may have to restart the app. If it won't appear, restart you device and try again.
On leaving the settings dialogue, the app tries to connect. This may take up to a minute. Also check if you have to enter a PIN to do pairing (e.g. after changing the name of the BT-Module).
For further information about Bluetooth and OPLink usage, refer to OPLinkConfiguration-Telemetry+RemoteControl+Bluetooth
Views
General
Menu
Press ![]() on the top left or your phones "menu" button to open the menu.
on the top left or your phones "menu" button to open the menu.
Toolbar

| Local App Settings | If this button is visible, there are local settings available, like changing the look and feel of the current view. |
| Flight Controller Settings | If this button is visible, there are settings on the flight controller available, like setting the fusion algorithm or setting the battery capacity. |
| UAVO Check | The App checks if the loaded UAVO are matching the flight controller firmware. If this icon is green, everything is OK. If it is red and blinking, there is something wrong. Touch it to see further information. |
| Serial Connection | Shows the current connection, either Bluetooth or USB. While red and/or flashing, connection is being established. |
| UAVO Handshake | Both symbols need to be green for the UAVO handshake to be successful. If unsuccessful, only explicitly requested objects are send from the flight controller. If this is often turning red on Bluetooth, consider reducing the baud rate of the telemetry port and/or the Bluetooth module and/or the OPLink. |
Health

Panels
To choose the panels, press the ![]() button.
button.
System Health Panel
The system health panel is a representation of the health widget in the GCS. Details about the fields can be found on the SystemHealth wiki page.
There are some slight changes to the Panel, but it is basically the same as in GCS.
The current communication with the flight controller is depicted on the health panel. Usually, there should not be a lot of bad ![]() packets (some are OK), and a constant stream of sent
packets (some are OK), and a constant stream of sent ![]() and received
and received ![]() packets.
packets.
Additional Info Panel
The following information is presented on the additional info panel:
- Arming state (also available as Text2Speech)
- Flight Time = time span the flight controller is powered
- Flight Battery Voltage
- Current Ampere drawn from the Flight Battery
- Flight Battery mAh
- Flight Time left (as calculated by the flight controller)
- Current Altitude (tap to reset to zero)
- Vertical Speed in meters/second
- Current Flight Mode
Map Panel
You can show the Map as described in the Map section of this page.
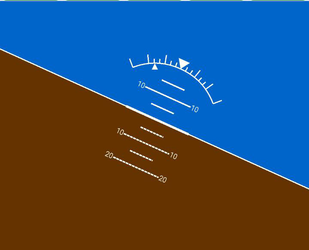
PFD Panel
The Primary Flight Display shows an artificial horizon and other information.
Local Settings
Text2Speech can be set to be available in the health screen.
You can also set which panel should be shown on the left (top) and right (bottom) in vertical (horizontal) orientation. If you choose the same Panel in both boxes, only the chosen panel is shown, filling the whole screen.
Flight Settings
Flight Battery Capacity and Flight Battery Cells can be set here, as well as the fusion algorithm used by the flight controller.
Map
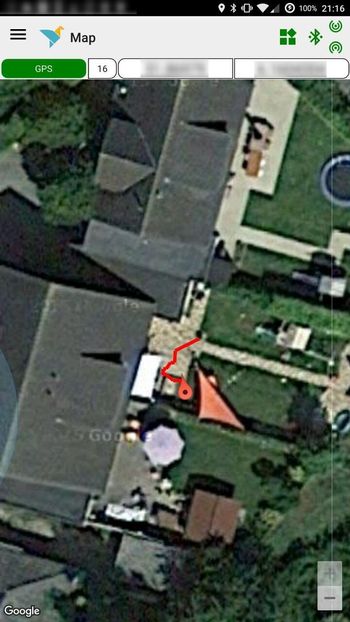
The Map shows the current position of your LibrePilot device. The marker is rotated in the direction the GPS thought it was heading. The last 20 positions are shown as red path.
On the top of the page, you can see the current GPS state. The Map also shows your HomeLocation, if set.
Objects
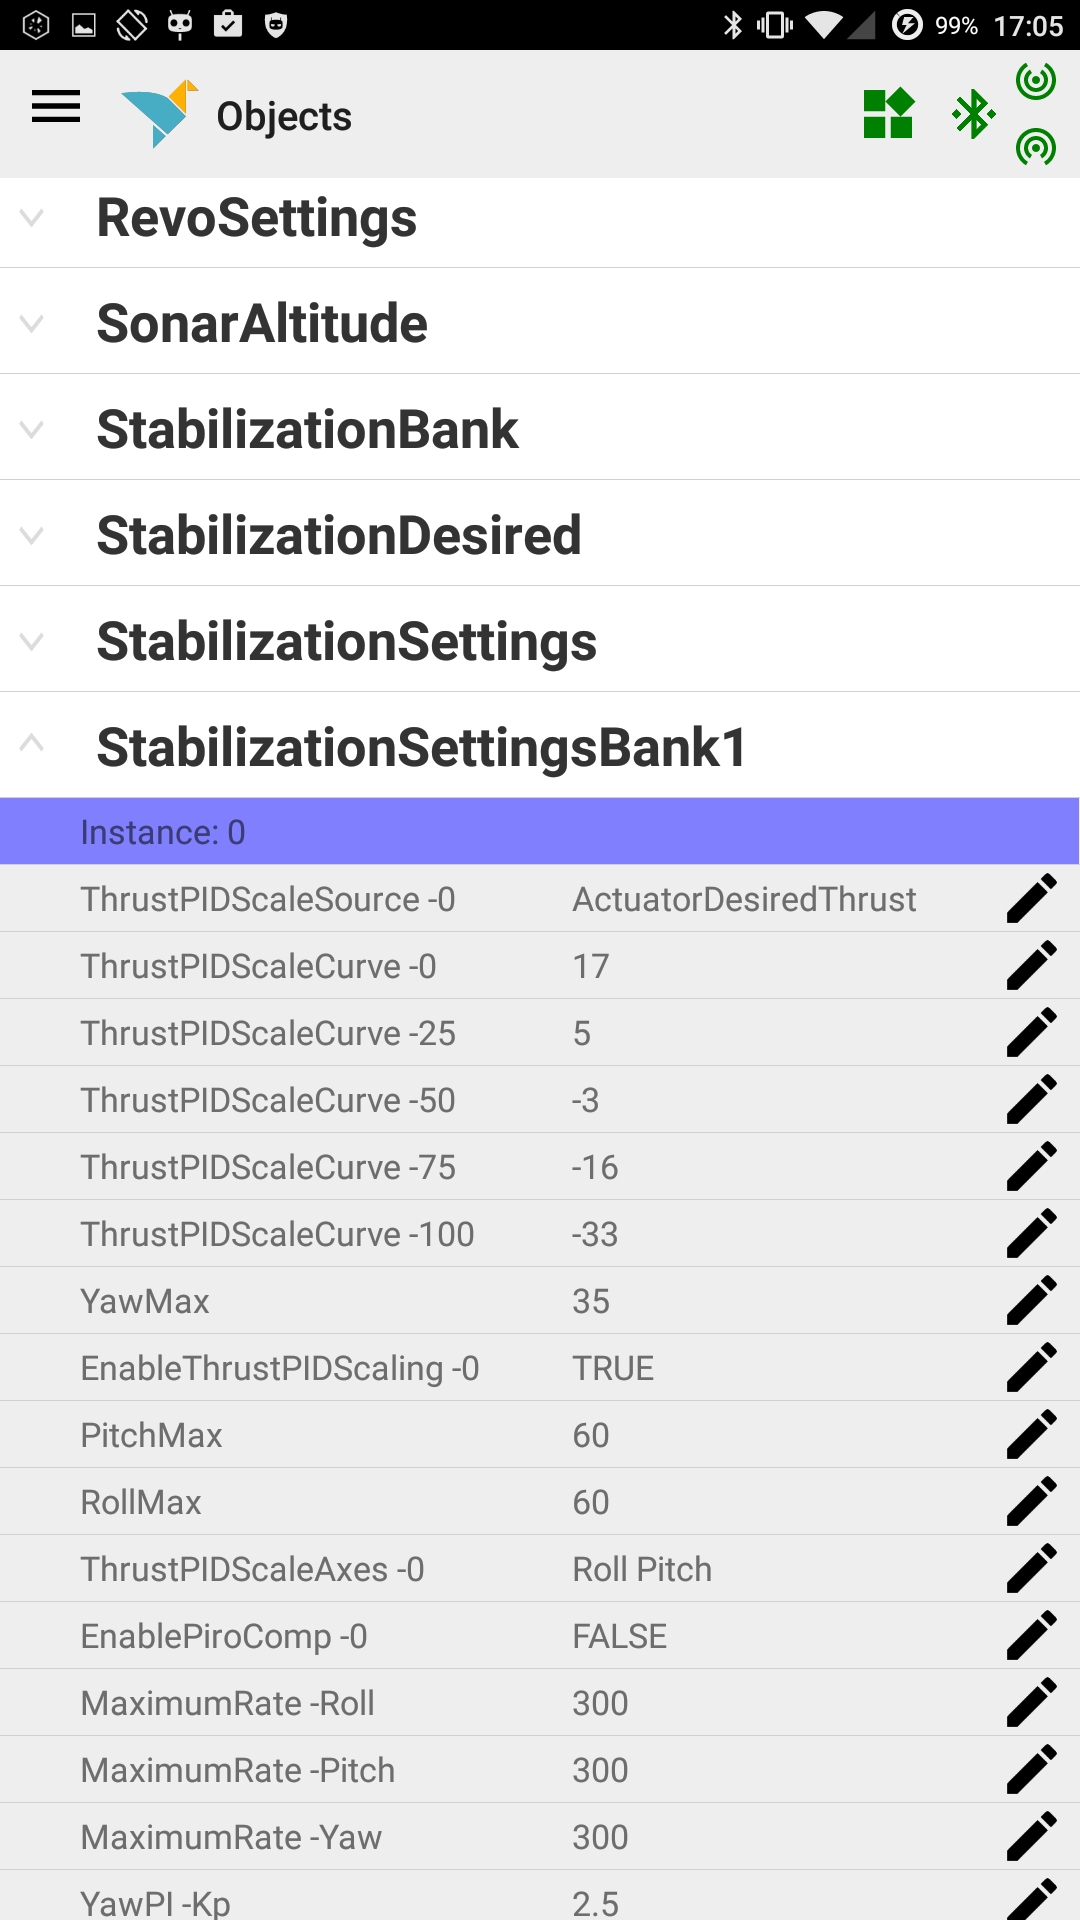
Initially this view displays a list of all loaded UAVO.
After tapping a specific UAVO, the app tries to load the UAVO from the flight controller and displays it.
If it is a settings UAVO, you can edit the value by tapping on the pencil icon.
The dialogue allows to save the settings, which means the object is saved persistent on the flight controller, or to just upload it, meaning that it will be discarded on powering off the flight controller.
PID Tuning & Altitude Hold PID

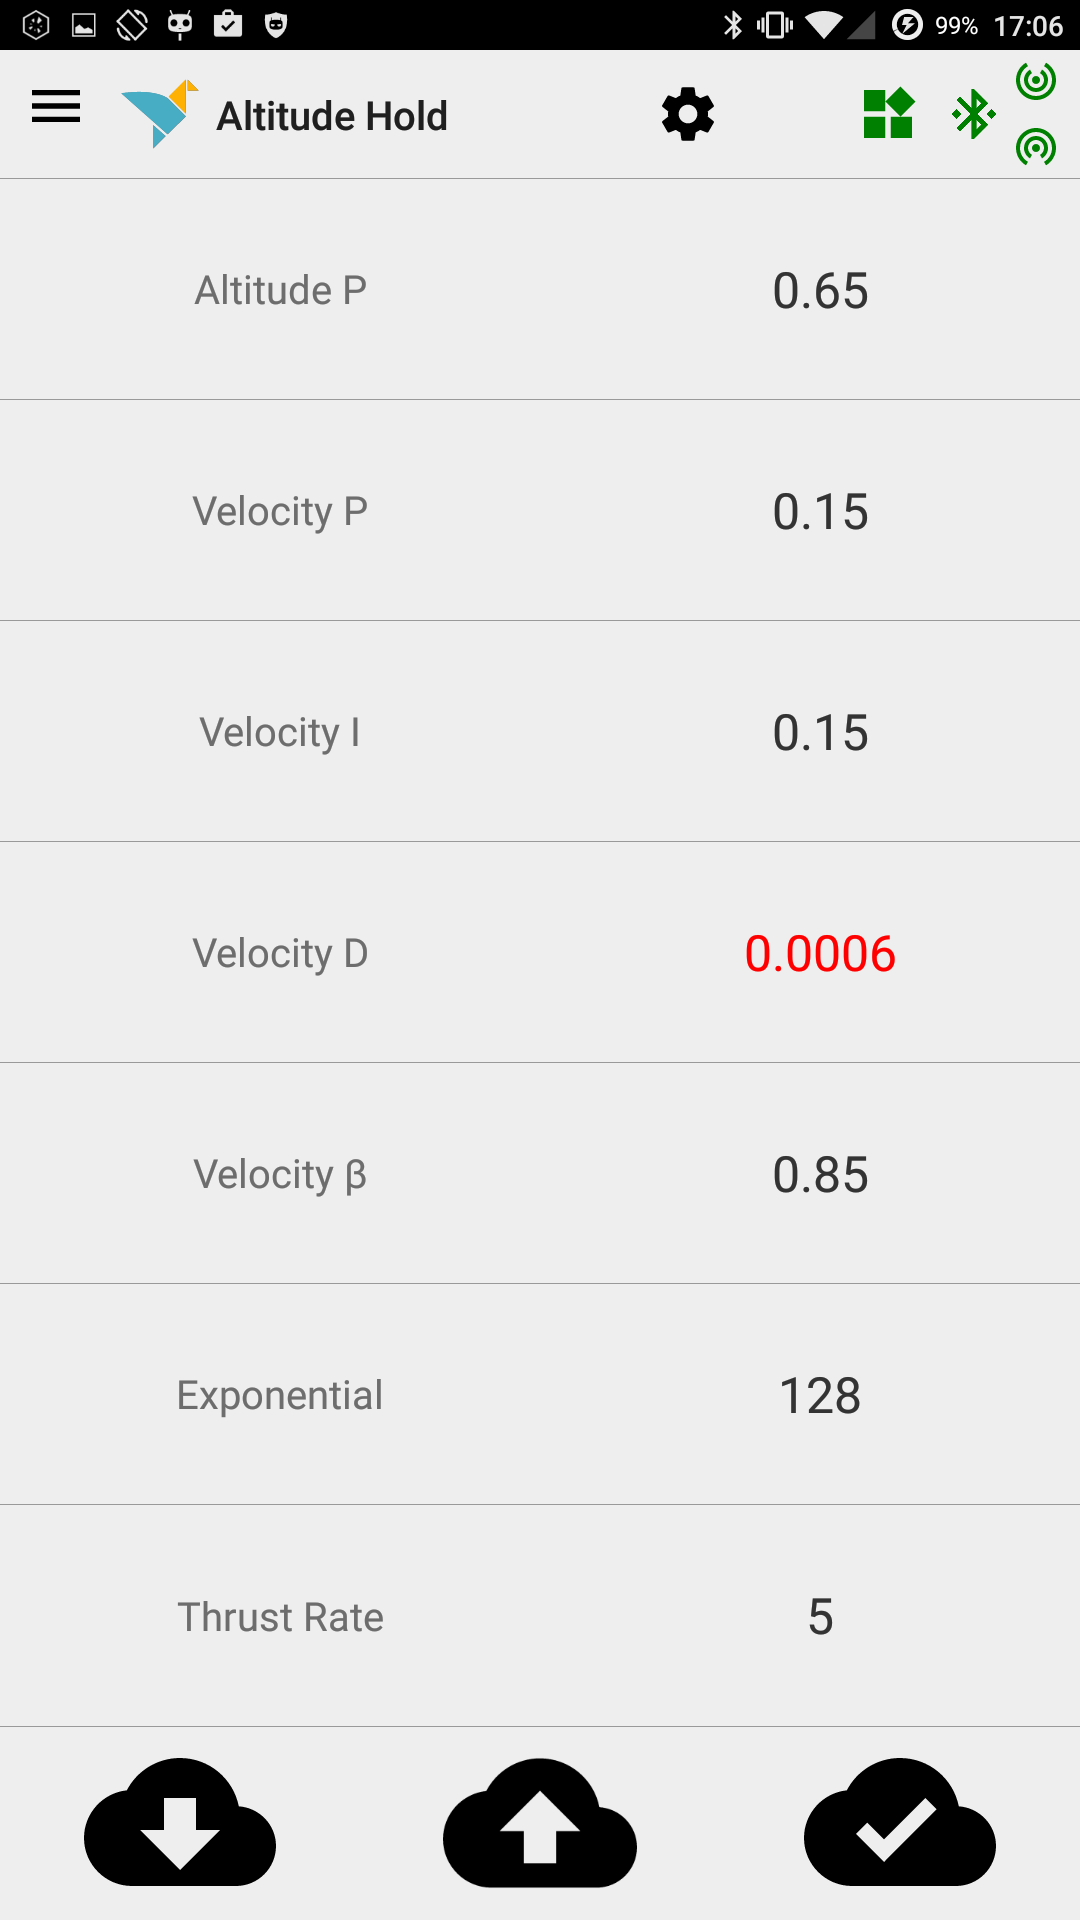
PID Tuning always loads the PID for the currently selected bank. Bank number is indicated to the lower right.
Vertical PID are global and not bank dependent.
After changing the bank via the flightmode switch, you have to press the download button to get the new PID. Wait for the bank indicator to change and for at least some numbers to become red, then press download. Numbers are red if the currently shown numbers and the numbers on the FC differ. This happens if the bank on the FC changes, and therefore the PID, or if you change numbers locally. If the numbers on all banks are equal, no number will turn red.
To change a number, tap on it. A popup will appear where you can change it via slider, buttons or direct entry.
Tap the Upload Button to send the PID to the FC. After sending, red numbers should turn black again. Tap the Save Button to make the PID persistent. It will save the currently uploaded values and disregard any local changes. If you do not tap the Save Button the values will be discarded after powering off the flight controller.
Known bug: You cannot enter negative values.
Logs
Logging
Press ![]() to start logging. Everything the App receives from now on will be logged. Any old log will be overwritten.
to start logging. Everything the App receives from now on will be logged. Any old log will be overwritten.
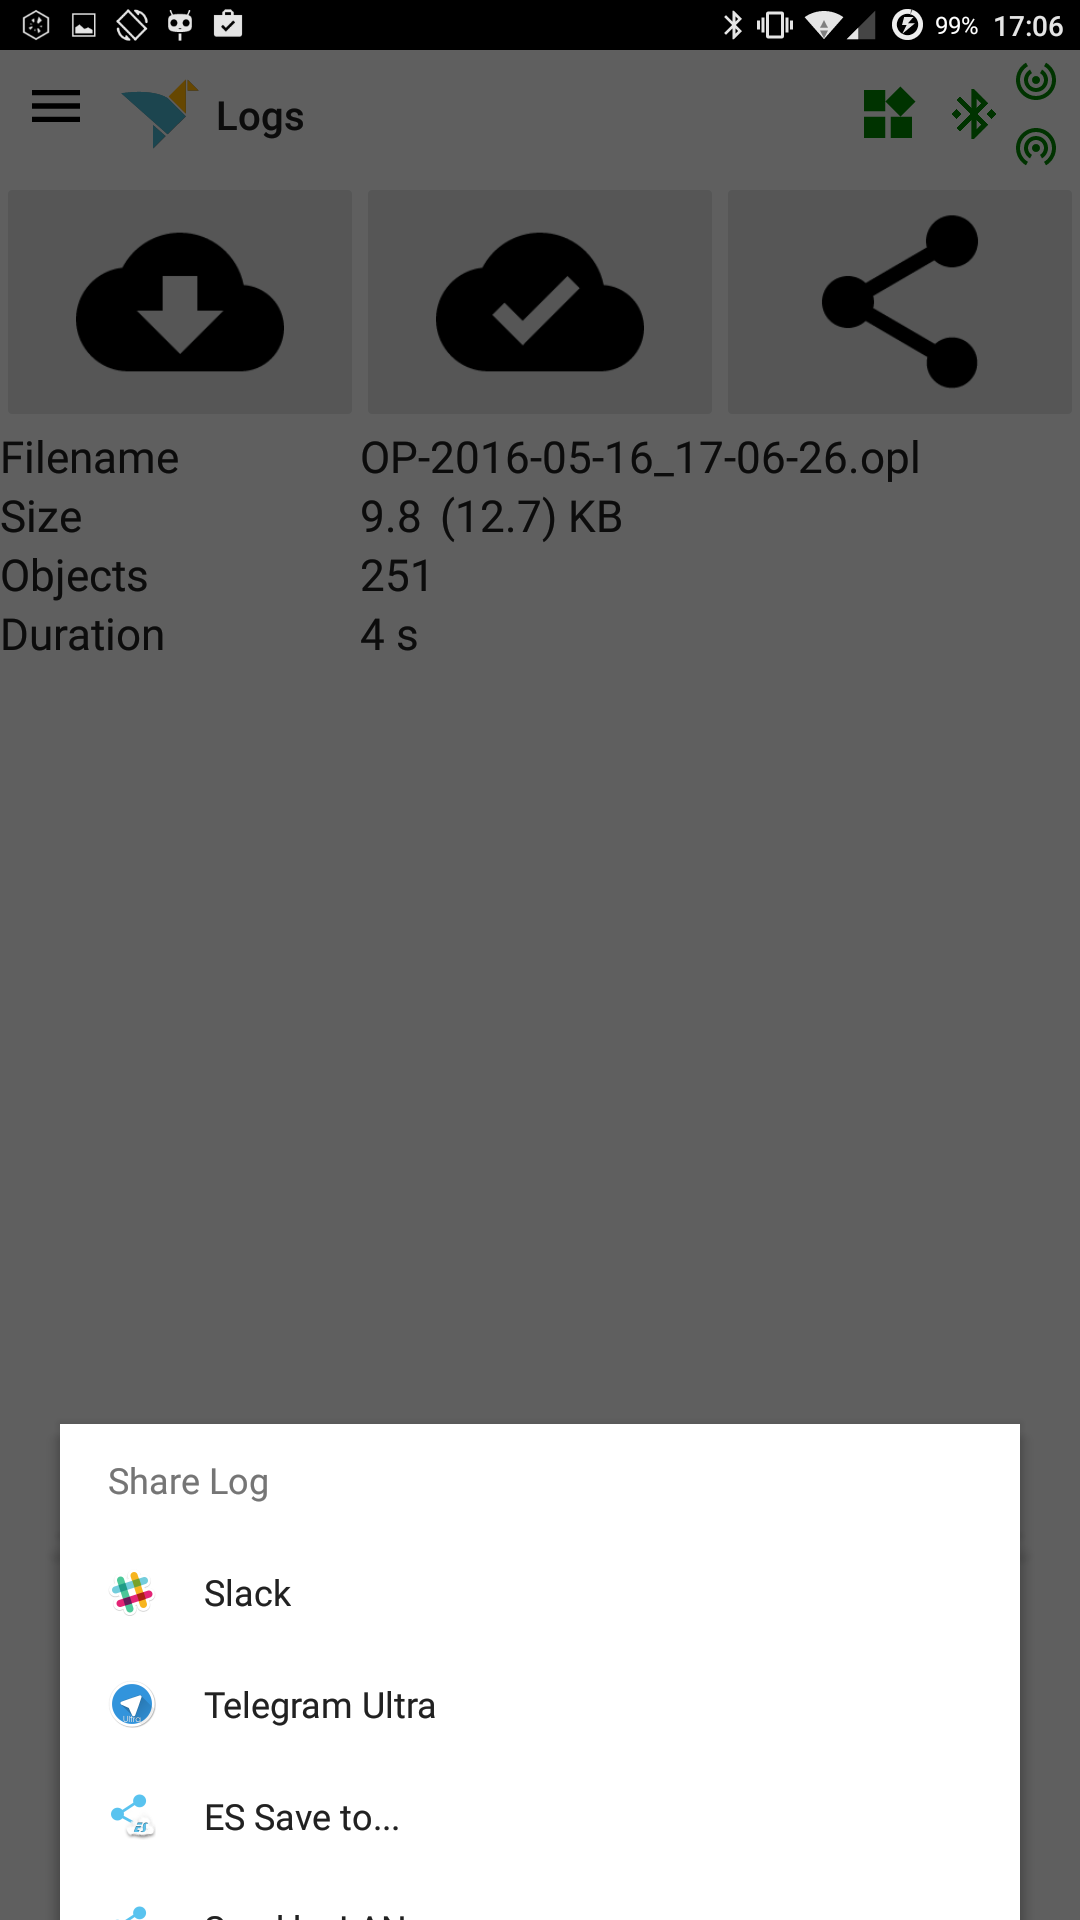
Press ![]() to stop logging. The file is closed, nothing else happens. You can start a new log or share the saved log.
to stop logging. The file is closed, nothing else happens. You can start a new log or share the saved log.
Press ![]() to stop logging (if not yet done by pressing stop) and share the file. You can share it via Google Drive, WhatsApp, or whatever app is accepting "application/octet-stream".
to stop logging (if not yet done by pressing stop) and share the file. You can share it via Google Drive, WhatsApp, or whatever app is accepting "application/octet-stream".
It has been tested with Google Drive, Slack and Telegram Ultra. Telegram changes the filename to something strange, but the content is OK.
The first size number is the size of the received UAV Objects, the second the size of the logs (UAVO + OPL Header).
Advanced features
Settings
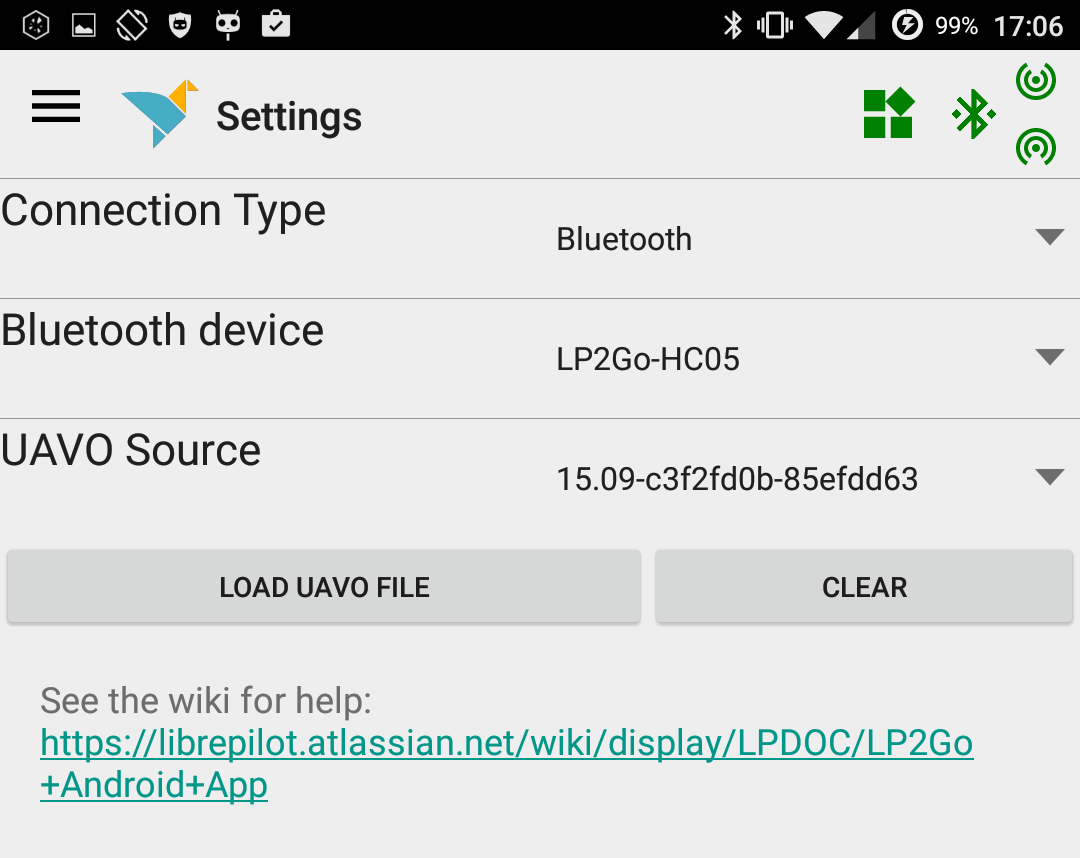
You can set your serial connection type, as described in the Connection section.
With "UAVO Source" you can select a different LibrePilot release. At the moment the 15.09 Release (Supermoon Eclipse) and 16.09 Release (Black Rhino) UAVOs are shipped, as well as some RC's.
Loading new UAVO files is only needed if you are using a self compiled version of LibrePilot, most notably "next"!
About
View Information and Licenses.
Licensing
LibrePilot2Go is licensed under the GNU GENERAL PUBLIC LICENSE, VERSION 3
(https://www.gnu.org/licenses/gpl-3.0.de.html)
- The material icons are reproduced or modified from work created and shared by Google and used according to terms described in the Creative Commons 4.0 Attribution License.
The Android robot is reproduced or modified from work created and shared by Google and used according to terms described in the Creative Commons 3.0 Attribution License.
- For further licensing information see the about dialogue in the app.
Alpha Features
3D Mag Calibration
Warning!
This is the first alpha version of a rather complicated feature!
This will try to calibrate your mag, upload the data to the flight controller and make the persistent. Do not try this in a production environment, meaning: If you want to fly, do not use this as your sole possibility to do a mag calibration.
Also, read this before using an AuxMag: Aux Mag Setup and Calibration
Here's also a nice Video on how to set the Orientation of you Aux Mag: https://www.youtube.com/watch?v=qLsd4O75N9o
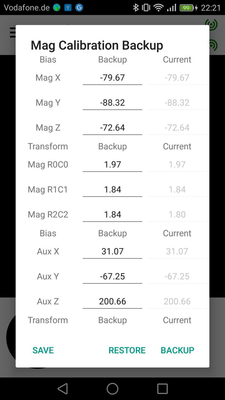
Use your GCS to backup your mag calibration data. You can simply write down the following values:
RevoCalibration => mag_bias => X,Y,Z
RevoCalibration => mag_transform => r0c0, r1c1, r2c2
AuxMagSettings => mag_bias => X,Y,Z
AuxMagSettings => mag_transform => r0c0, r1c1, r2c2
If the app messes up your calibration, put those values back with the GCS to revert to your previous settings (you can do this with the app's object browser).
Backup the values for AuxMag even if you do not use AuxMag.
You can also use the local settings (![]() ) to use the Backup-Feature, which is of course in testing state:
) to use the Backup-Feature, which is of course in testing state:
The Compass Calibration uses a 3D representation of the magnetic field your magnetometer measures.
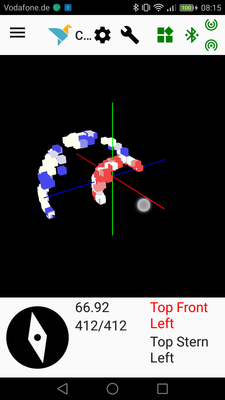
- Wait for a connection to your flight controller
- Press the Compass icon to start the sampling.
- Collect at least 700 samples by turning around the flight controller in all directions.
- After collecting at least 700 samples, press the compass button again to calculate the fit and upload it to the flight controller.
- Fingers crossed.