| Key | Description |
|---|---|
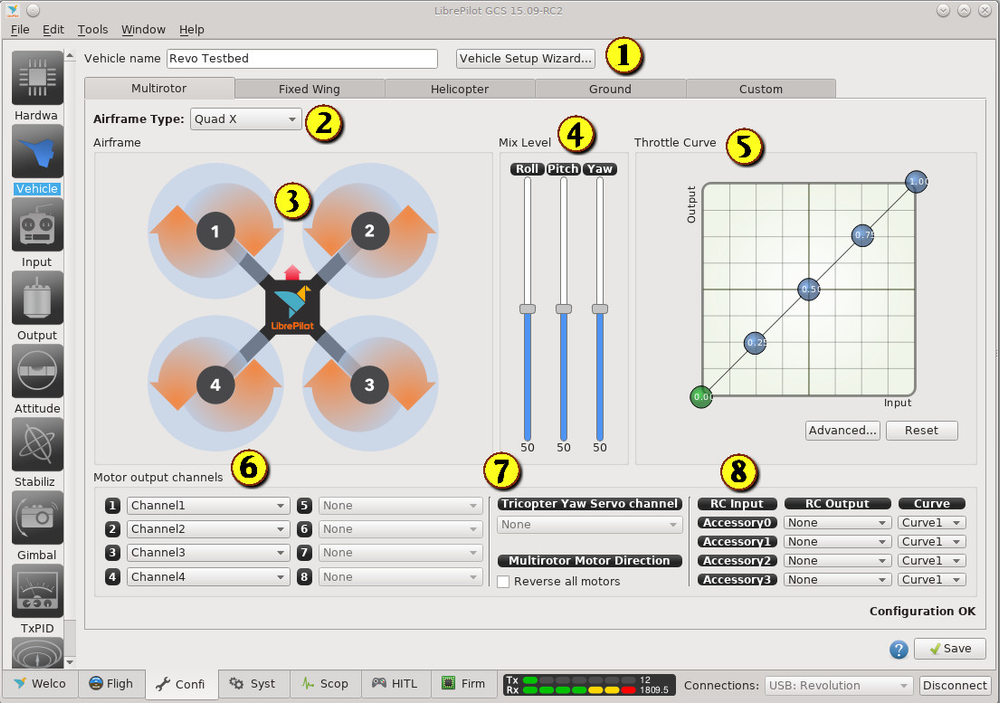
| 1 | Vehicle Name. Allows you to configure the vehicle name on the flight controller. Also a button to allow the vehicle setup wizard to be run. If this is the first time you have set up the airframe, it is recommended to make use of the wizard to step through the setup. |
| 2 | Tabs across the top allow the airframe type to be selected. The tab shown above is for multicopters, and the airframe type is selected from the drop down widget at the top. |
| 3 | The main graphic shows the airframe configuration and motor identification |
| 4 | The mix levels allow the inputs to be mixed for different airframe configurations. |
| 5 | The Throttle curve is adjustable, to allow the sensitivity to be adjusted around the hover point. This can make it easier to maintain the hover. There is an advanced button which displays a dialog capable of calculating the different points mathematically. |
| 6 | This is where the motor output channels are allocated. Up to 8 motors can be connected. |
| 7 | This setting is specific for a tricopter - the flight controller needs to be able control the tail tilt servo to manage the flight pattern. There is also an option to reverse all motors |
| 8 | Up to four accessory channels can be utilised. They can mapped to any of the 12 receiver channels |
Remember to save once the configuration is complete.