Git Workflow
Getting set up
To get started sign up for an account on Bitbucket
![]()
Now you can clone your fork using the https or ssh protocol e.g.
git clone https://YOUR_BB_USERNAME@bitbucket.org/YOUR_BB_USERNAME/librepilot.git
for https which is the easiest to set up.
Next add the main LibrePilot remote, you can use anything that makes sense instead of upstream, I simply use bb to keep the length down.
git remote add upstream https://bitbucket.org/librepilot/librepilot.git
Optional
You shouldn't need a next branch in your fork so:
git fetch upstream
git branch --set-upstream-to=upstream/next next
git push origin --delete next
Starting some work
Get latest
Get the latest from upstream
git fetch upstream
Create new branch
Now start your branch, the LP-XX refers to the JIRA ticket you pick for your work:
git checkout -b LP-XX_branch_name upstream/next
Make changes
Make some changes and 'git add files', double check what you are committing 'git diff --cached'
Before adding files, the files changed can be displayed using 'git status'
Commit
Now commit using 'git commit' command.
Refer to the Jira id in the commit message: "LP_XX ...". This will ensure the commit is picked up by Jira and linked to the original issue.
Probably add some more changes / commits
Rebase
Once you have finished working on the branch, you are now ready to push it to your fork but there is an extra step you should do to keep things tidy and up to date with the latest LibrePilot so there are no merge conflicts.
git fetch upstream
git rebase --interactive upstream/next
This gives you the chance to also amend/fixup/squash/reword/reorder any commits if you want.
Rebasing can initially by daunting but it is an essential git skill so it is worth learning the ins and outs of it.
Remember if you get into trouble you can always 'git rebase --abort' and ask for help.
Push your code
Now push it to your fork
git push -u origin HEAD
Create a pull request
Now you can create a pull request at the main repository
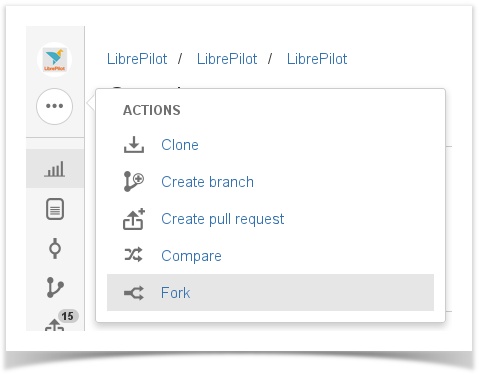
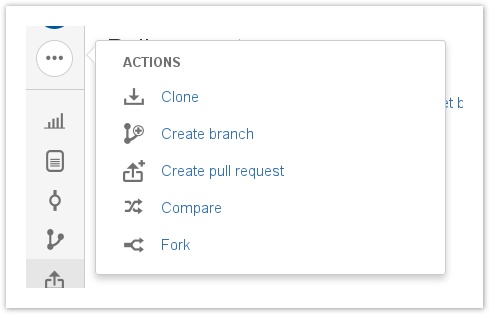
Go to the personal repository page (eg. https://bitbucket.org/YOUR_NAME/librepilot/, open the left menu  and choose "Create pull request"
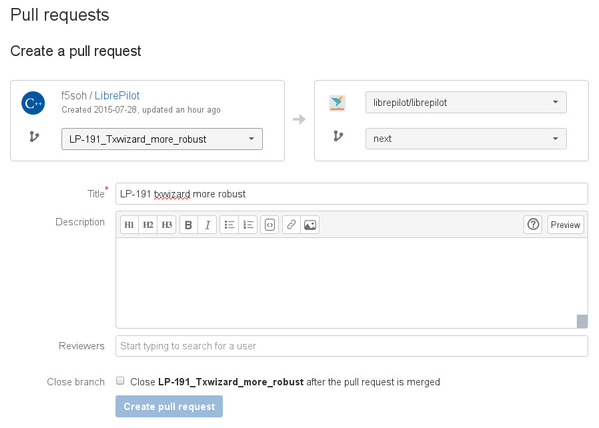
Choose the branch you want to use for the pull request (from your repo) and the destination branch in main (Librepilot) repository, usually the next branch or a release branch. NEVER branch
Add a title starting with LP-XX so the pull request is linked with JIRA issue.
Add a description about the changes / commits
Choose 'Close LP-XX after the pull request is merged'
Create pull request.
Reviewing someone's work
To quickly checkout out someone's work do:
git fetch https://bitbucket.org/THEIR_USERNAME/librepilot.git <branch_name> && git checkout FETCH_HEAD
If
 you are likely to be reviewing this users work a lot you can add their
fork as a remote to save using the full URL each time you can add the
remote repo:
git remote add <dev's_name> https://bitbucket.org/THEIR_USERNAME/librepilot.git
and then each time just do:
git fetch <dev's_name> && git checkout <dev's_name>/<branch_name>
Where <dev's_name> is the remote repository name you choose.
git remote
give a list of available remote repositories